Now Offering 1 hour Consultations
BOOK A TIME TODAY!

Best, Katie

When the going gets tough… the smart take a break?

This post may contain affiliate links, please read my disclosure policy.


Mental Health
When the going get’s tough the tough might keep going, but perhaps the smart take a break.

Regular readers may have noticed that while I was on vacation and for a week after coming home, I took a little break from the blog. Usually I post multiple times a week, but for the past 16 days it has been radio silence, other than some social media posts.

I’d like to tell you it was so I could fully engage with my family while on vacation and that I needed a bit of time to get settled into life when we got back, which is partially true, but the truth is 2016 kicked my ass, and I wasn’t quite ready to take on 2017.

I’ve read a lot of articles and posts like this over the past few weeks, so I’m going to go out on a limb and say 2016 was just one of those years. As an adult and as a Mom, I’m the type of person that abides by “when the going gets tough the tough get going.” I can, without hesitation, say that 2016 held some pretty terrible days and, for the most part, myself and our family kept going.

What choice did we have? The world doesn’t stop for anyone.

So what happened in 2016? It’s rather public knowledge (at least for my readers) that I miscarried in the spring and that I published a piece on how I felt, months after the fact, this fall.  What’s a little more private, is that when the article was published I had recently found out I was pregnant, and that a few weeks after, I found myself once again staring at a monitor that confirmed that this time wasn’t going to work out for me either.

The feelings were different, in some ways stronger and in some ways more suppressed. The first time, I cried and grieved a lot. I wrote out my pain. This time around there were way less tears. Everything about the experience was different, from how it happened to how I behaved after. The next day, I got up and life went on as if nothing had ever happened. I haven’t been as comfortable talking about it, and when I do it’s more matter of fact.

Perhaps, it’s because after my piece for Scary Mommy was published I received an outpouring of responses from women who had connected with it, some of whom had experienced several miscarriages, and I didn’t want to ruin it by disclosing that today I was a little more jaded and a lot more angry. Maybe I’m just a little ashamed that it’s easier for me to operate under the assumption that I’m going to be the mother of one, rather the mother of multiples I’d presumed I’d be. The bottom line is, thus far, I’ve had no interest in waxing poetic about it.  (Yes, I know in all likelihood, statistics show that I will go on to have another healthy pregnancy, if not multiple, but I’m talking about how I feel, not about what is realistic. There is a difference.)

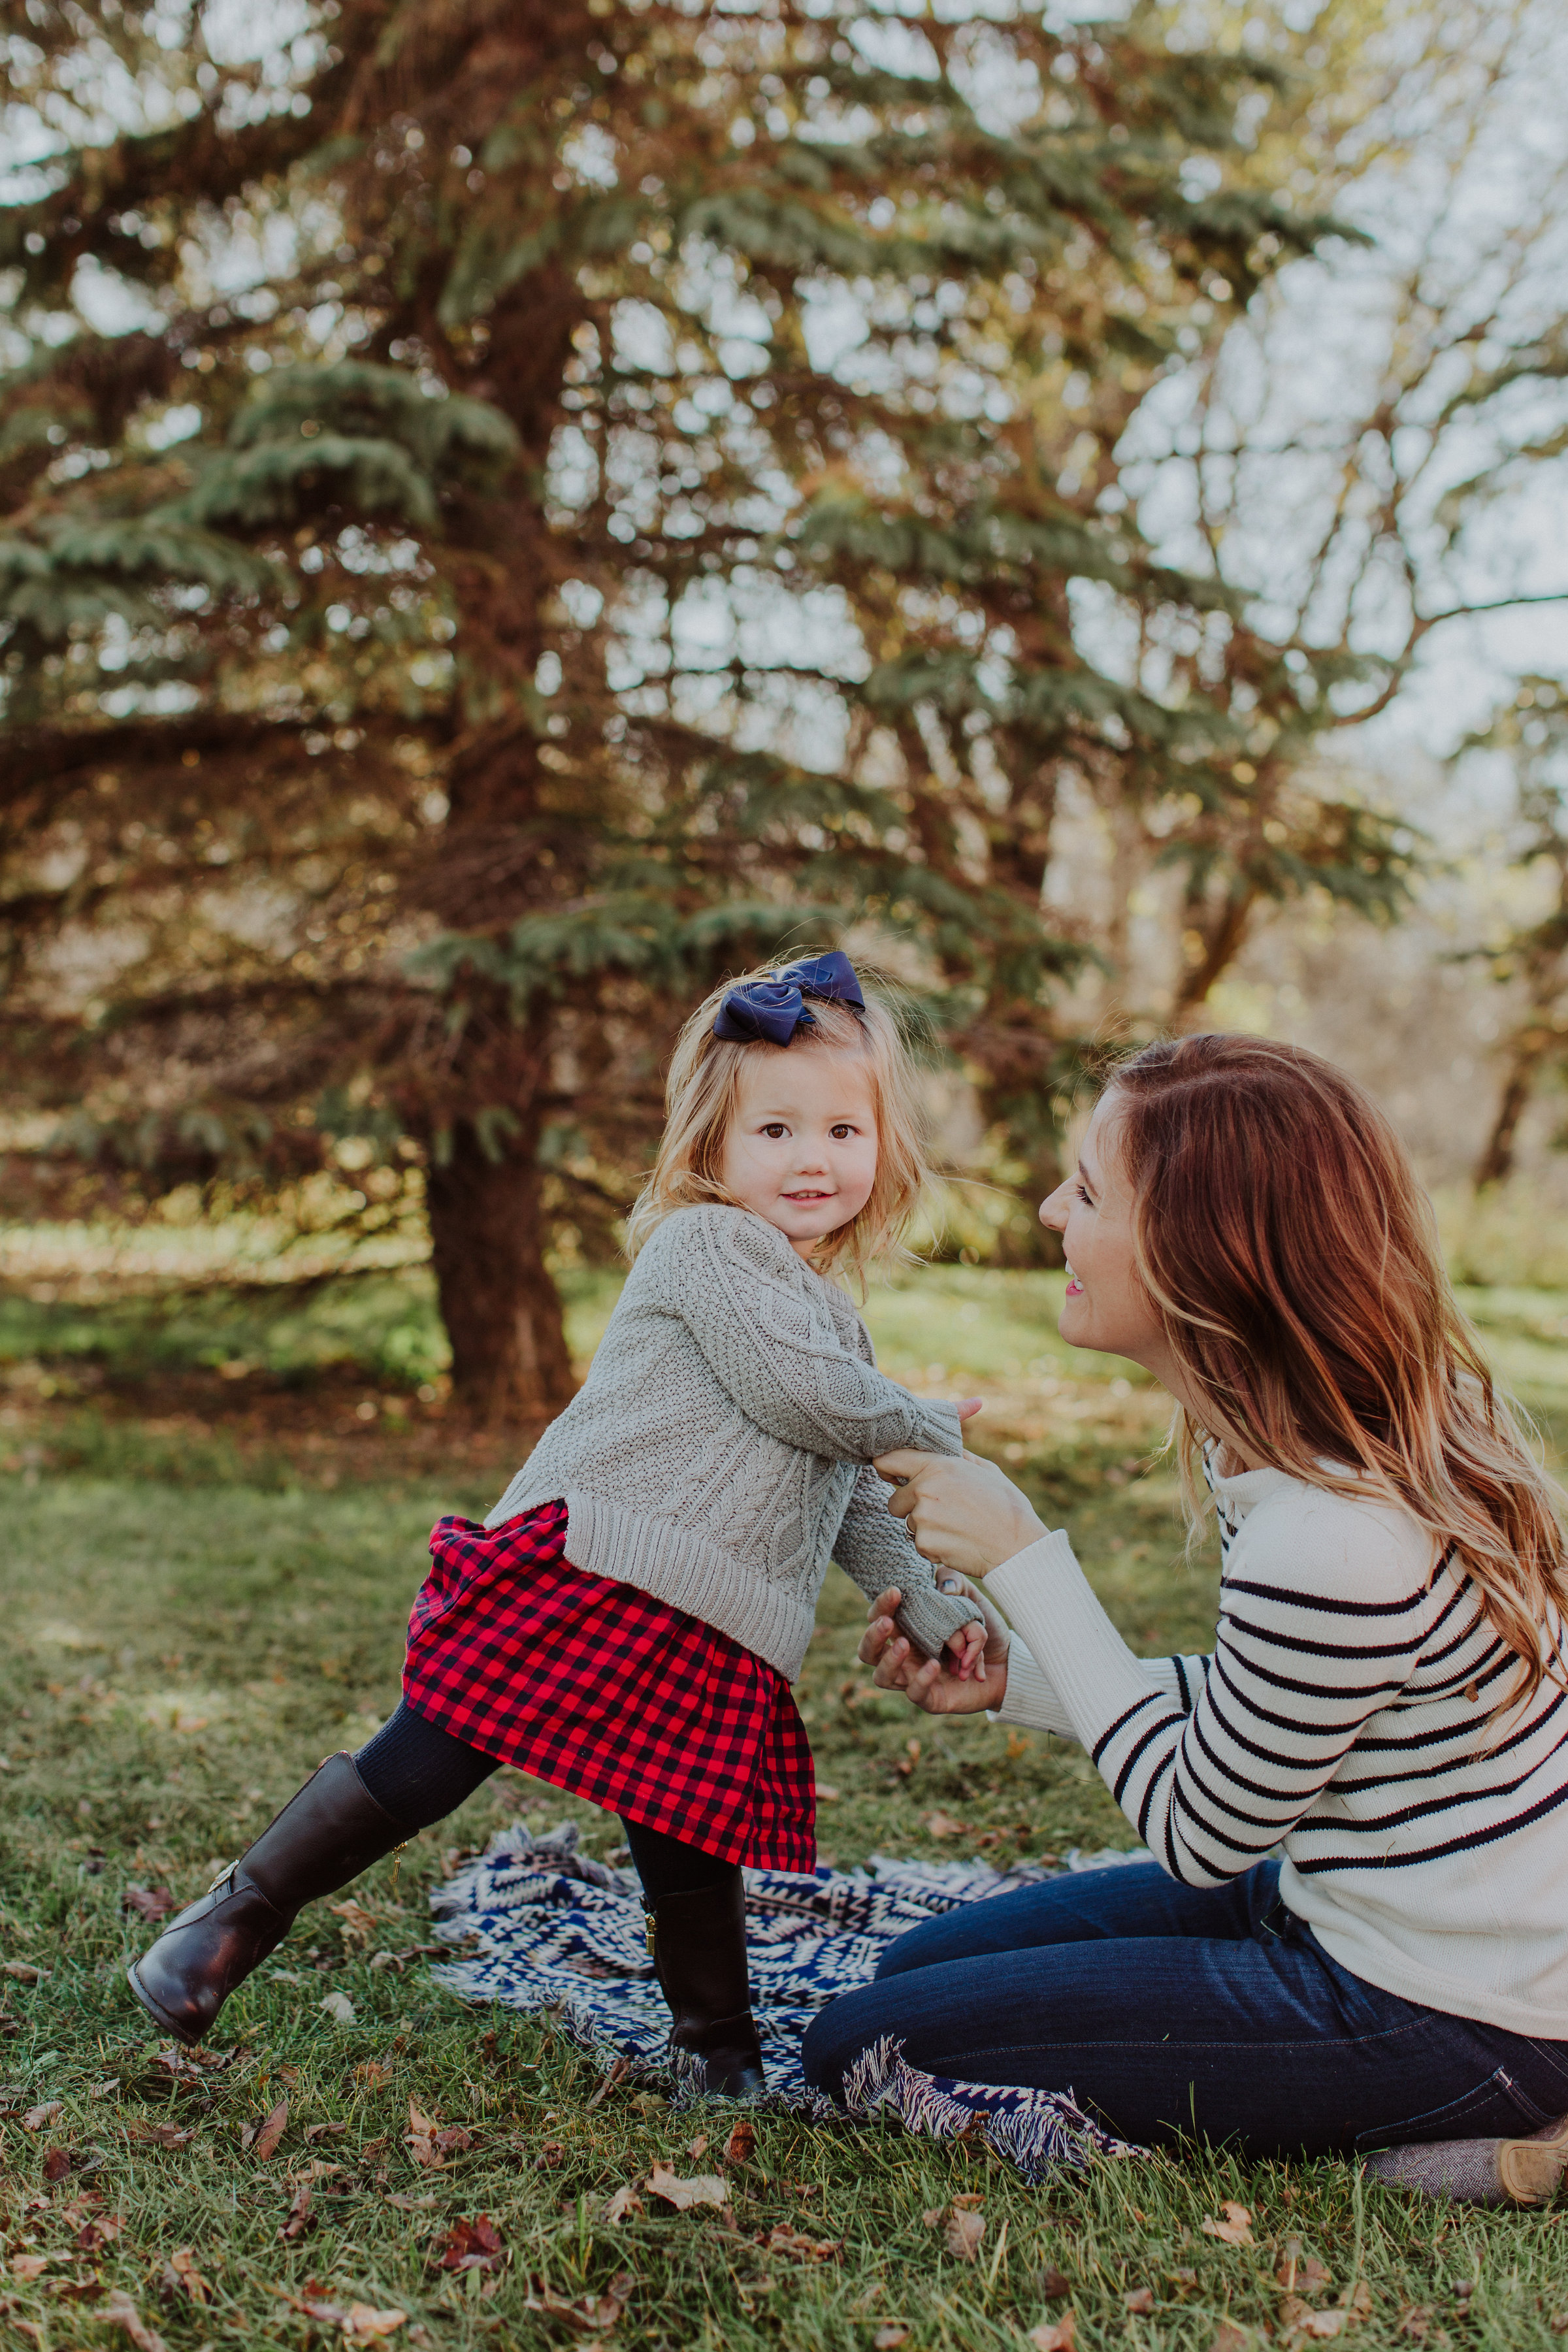
I’ve been really lucky in life, as I’ve experienced very little loss, so this year’s big trials mixed with the small ones, like starting this blog, finishing our basement, and mothering a toddler took a toll on my soul.

But here is the problem, I didn’t even realize it, or what rough shape my spirit has been in, because I just kept going. I’m tough and the tough keep going. That is until they can’t.

Powering through is all great and good, because it’s true that the world doesn’t stop for anyone, but I’m starting to realize that when you don’t hit pause on your personal world every once in a while, you’re not going to have much of yourself to give. I generally work on the site or as a homemaker every hour I’m awake, which is way more hours without sleep than any doctor would recommend. Does the make me a hard worker? Sure. Does it make me tough? Maybe. But I’ll tell you what. It sure as hell doesn’t make me smart.

When we arrived in Hawaii for Christmas I unintentionally took a break, and I realized how wrong I’ve been. I love vacations, but by the end of them I’m usually ready to come back to my every day life. This time I wasn’t, so I didn’t. I may have returned to the land of snow, but I kept taking time to myself.

I’ve come to realize that powering through in 2016 meant I had less to give. I’ve been less of a mother, wife, business owner and friend than I could have been. Was I bad at any of these things? No, but I know I could have been better.

More self reflection and breaks in the 365 days of 2016 would have probably meant more days with tears, but it also would have meant more days when I could have appreciated the good. Because no matter how awful some of the days were, the majority of them were pretty awesome. Sometimes I was just too busy to fully notice them as they were happening. I’ve come to realize, that if you don’t let yourself feel, you may not find yourself crying in the shower, but you miss an awful lot of awesome moments.

So, two weeks late, here’s to 2017. A year, hopefully, filled with better luck, more giggles, some awesome DIY projects and posts, and a few more breaks, because when the going get’s tough, the smart sometimes take a break.

Best, Katie

Read related posts:


Best, Katie

The Secret Sisterhood of Miscarriage

This post may contain affiliate links, please read my disclosure policy.

The Secret Sisterhood of Miscarriage

*This story was originally published on Scary Mommy in November 2016

Miscarriage — it’s a dirty word, isn’t it? It’s a word you keep to yourself or whisper within close company, despite the fact that up to one in four women experience one. If you have a miscarriage, you become a member of a secret club that few outside the sisterhood want to talk about and that no one wants to join.

I found out my child had died inside me on a Monday, one day after Mother’s Day and two weeks after hearing the heartbeat. My baby was 8 weeks old. You’d think that finding out is when you feel it the most, but it’s not.

Since it was my second pregnancy, when they quietly but desperately searched for the heartbeat on what my doctor said was an outdated monitor, I knew. I knew when the technician came upstairs and could find nothing. I knew when they sent me downstairs with the false hope that it could just be the monitor. I knew when the ultrasound tech with the fancy machine told me she couldn’t tell us the results, regardless of what she found, and turned the monitor away. I knew. I felt nothing, but I knew.

Then came the call and the “I’m so sorry.” Then the tears came. I knew, and now I felt. The rest is a blur. They told me what to expect and my options, but I didn’t hear a thing.

Publicly, I decided to power through. I told close friends and family I was ready to move on. Privately, I cried in bed while my husband cared for our 1-year-old and processed our loss himself. I was told to expect a whirlwind of emotions in the pamphlets I was sent home with. I was told what to expect when I scheduled my D&C. I was told what my options were for handling the remains of my dear sweet baby. My chart even told me I was experiencing a “missed abortion” because along with my heart, my body missed the memo my child was gone.

I painstakingly researched my options and the facts of miscarriage. I was nothing if not well-informed. My medical staff was kind and attentive when they explained why they couldn’t perform my first scheduled surgery. I knew all the reasons why. I was too sick with a respiratory infection to be put under, and to add insult to injury, my prevailing morning sickness was a problem for sedation.

I knew it would be hard when I finally had my procedure two weeks after finding out my child’s heartbeat had stopped — two weeks without a single physical sign, just the confirmation from a silent, still ultrasound machine.

I wasn’t surprised when days after the surgery, I found myself in church feeling empty and sobbing as the band sang “Amazing Grace.”

I wanted to shout to anyone within earshot, “I’ve had a miscarriage.” I wasn’t even surprised when I felt myself moving on when the days got easier.

But there were things I didn’t know.

I didn’t know that people who owed me nothing would show me the greatest kindness, or that their kindness would be my silver lining. I didn’t know that even after I moved past the mourning stage, I would still feel it, or that I’d feel it in the strangest way. It wouldn’t be overwhelming despair, but a fleeting thought, like the soft touch of an unfulfilled wish.

No one told me what it would feel like to watch my almost 2-year-old rock in her little rocking chair while whispering “I love you so much” to a doll cradled in her arms. No amount of research could have prepared me for the fact that the words “sister” and “brother” would feel like ice off my daughter’s tiny lips.

I didn’t realize what it would feel like to see one line on the pregnancy test instead of two, or that I could want for someone who did not yet exist so deep in my soul.

I was not prepared for how bittersweet it would feel to watch my living child age. It’s a subtle reminder of my body’s inability to give her a sibling close in age — a sibling she doesn’t miss, but I do.

I didn’t know that it wouldn’t be the pregnancy announcements that would get me, but the announcements of loss. I didn’t know that I’d feel authentic joy for those who had healthy, glowing pregnancies. But the loss — oh, does the loss get you. It was pretty shocking that someone else’s miscarriage would bring me right back to that day, the day I knew.

No one could have explained how the longing creeps up on you when you least expected it, like when you’re alone, when the seasons change, or when you wake in the night. I didn’t expect to feel it the most when glancing at photos of happy family memories. It’s the sense that something, someone, is missing.

Now I know. My heart will always miss a child I’ll never hold, that I’ll never name. No matter how many children I have, there will always be room in my heart for that one, my angel baby.

Now I know. Miscarriage — it’s not a dirty word. It’s just a hard one.

Best, Katie
Design

The End is Near – Basement Update

This post may contain affiliate links, please read my disclosure policy.

I apologize this post is long overdue and already out of date considering I took these pictures before we left for a holiday vacation to Hawaii.

However, in case you missed my Facebook Live video from before we left town, I wanted to share some progress pictures of the basement, and to explain some of our decisions. Plus, I’m sharing what you can expect in the final reveal.

We will start in the dark entertainment room.

The coffered ceiling was installed a few weeks ago using pre-primed boards, meaning it’s beautiful crisp white details popped against the dark paint. You can see a picture of it here. I was absolutely terrified to paint the ceiling dark, even though that is what we’ve been planning to do all along.

Daren, as he is used to doing, eased my neurotic fears by outlining the reasons I had wanted to paint it dark in the first place, including that the contrast would make the white ceilings and walls pop in our bar area. He was right. Despite my moment of panic, I have no regrets. Though I must admit, I had to stop myself from coming downstairs while the painters were making the transition from light to dark because it was giving me heart palpitations.

Daren and I taped out the picture frame molding boxes ourselves, but this time around we had a finishing carpenter install them. We’ve done these ourselves a few times on our main floor, but we’re already paying Carpenter Homes‘ finishing carpenter to do a large chunk of work, so adding this project on to his workload seemed to be a reasonable financial decision. We love to save money, but we also place a high value on our own time.

We did, however, DIY the mantel for under $200. See the tutorial here.


These sconces from Rejuvenation will be placed in the smaller rectangles. We used this trim from Lowe’s for the boxes.

Save up to 75% on hundreds of open-box and clearance designs during the Warehouse Sale! While supplies last.

I’m personally loving how the elegance of our entertainment room offsets the rustic aspects of our bar. In many ways, the rooms, which are open to each other, are opposites. I think this contrast helps emphasize the details in both areas. What do you think?

The cabinet doors have been installed since this photo was taken, but like you I have not seen them (in person at least). I am dying to see how they turned out. If you need a refresher on the design see this post.

We bench has also been stained since we left on a jet plane. We went with the grayish stain in the upper right corner of the picture below.

Rustic beams from ICSS Supply Company have been installed since my last basement update. I ordered these pendants in white from Rejuvenation to hang from the ceiling beam, but I am concerned they are too big at 18 in. across.  While the majority of the lighting will be installed soon, we are temporarily holding off on these.

I’ll be writing a tutorial with Daren soon on how we created the accent wall in the bar, as well as, a tutorial on how we shiplapped the ceiling.

I didn’t include pictures of the guest bathroom in this post because it more or less looks the same since I posted last.  You can see that post here.

Our guest bedroom however is looking mighty good, even in these now outdated pictures. As of today, minus a few small details, this room is almost complete.

Again, I cannot wait to see it for myself in person!

We have a few fantastic hiding spots in this room. There is a door that leads to a room under the stairs, which we will be turning into a mini playroom for E, and there is hidden storage built in to the sides of the bunk beds.

Our motto is “never leave a sq. in. unused.”  A.k.a. We love storage!

The built in bookcase below is currently E’s favorite hiding spot. The shelf we will be adding will probably put a damper on that. Womp, womp.

I know what you may be thinking. These super controlling type A people left during a very important time in their basement’s construction. Are they nuts? Ok maybe you aren’t, but it has crossed my mind once or twice.

The truth is that it’s been hard for me to get updates just via my phone. Fortunately, we have a great contractor,  Carpenter Homes, and my parents are nearby. They all give me regular status updates. Modern technology has definitely made it so I can be involved even though I’m an ocean plus more away.

Let us know what your think of our progress so far in the comments below, and look for our upcoming tutorials on how we shiplapped the ceiling and wainscoted a wall.

To see all our basement posts click here.

Design

Design Options For Our Basement Stairs

This post may contain affiliate links, please read my disclosure policy.

Everything architectural has been selected for our basement, aside from one thing that we’ve been putting off for months…

What could this major design decision be you ask? Turns out it’s not so major at all. It’s simply our stairs.

Here’s what we are working with:

When we started the project, we had Carpenter Homes open up part of the stairwell to create a more airy space and to allow us to have a statement railing. While it was worth it, this project wasn’t easy for our contractors and cost a bit more than we imagined.

We also had them tear up the carpet, which our builder installed using carpet leftover from the upstairs’ bedrooms. It got pretty beat up during construction. They also lowered a built-in-shelf in the landing.

Perhaps the hangover from the wall removal is why when we got started on making the big decisions, like what the bunk beds should look like, and DIYing projects, like the mantel made from layering molding, we sort of forgot about the stairs altogether.

Every once in a while, we’d start chatting about whether we should take on the project ourselves or work with Carpenter Homes on it, and we’ve always known two things. 1. That we wanted a stair runner. 2. That we wanted a steel railing.

We’ve just never had the energy actually pick the railing and carpet. I also wanted to wait until the main areas were done so I could visualize the design options in my head better.

Now that the overall project is wrapping up, It’s time to get serious about the stairs. We’ve already made a few decisions, like that we will be working with ICSS Supply Co. on reclaimed wood treads to match the rustic beams they sourced to us for the bar. We will also be having our finishing carpenter install white skirt boards and risers.

Whether we are doing the install of the treads and carpet is still to be determined. Given our to-do-list is long, we may opt out of this project in favor of getting a start on E’s big girl room.

Either way, it’s going to take awhile to get the treads, since ICSS is in the process of moving to a larger shop. This buys us some time on the remaining decisions, so we are coming to you.

We’ve narrowed each option down to two choices.

(L) Photo and Design by Emily Adamson Design; Carpet – Only Natural by Tuftex Carpets of California | (R) Photo and Design by Young House Love, Carpet – Dash & Albert

Choice 1: The carpet runner

My vote is leaning slightly towards the Dash & Albert black and white runner, a la, Young House Love. You can get it in a variety of sizes for your own home here.

Daren’s vote is for the equally chic Tuftex Carpets of California’s Only Natural.

My favorite design house, Studio McGee, actually included both in a post highlighting their top picks for stair runners. Win, win in my book.

What could sway my vote? The fact the carpet would likely be easier to install than the pre-made runner. We plan to use caps on the side of the carpet and then use a carpet pad, rather than have wood installed across the whole tread. A pre-made runner would work fine on a wall to wall tread, but it may be a pain to install using our current plan. I’m really not sure.

The reason for putting a carpet pad under the fabric is two-fold, we want the stairs to be cushy and we’d like to save money on lumber.

(L) Photo by Tessa Neustadt for Amber Interior Design | (R) Photo by Rachel Whyte for Fixer Upper on HGTV

Choice 2: The steel railing.

This is simple and purely aesthetic. Vertical or horizontal?

We are both thinking vertical, but only if our manufacture, Red River Fabricating, Inc., can make the rails as delicate and modern looking as the picture above. If not, we’re going horizontal. If it is good enough for Joanne Gaines, it’s good enough for me.

Let us know what choices you would make below!

And don’t forget to follow us on social media!

[wc_social_icons align=”left” size=”large” display=”Facebook,google,twitter,pinterest,instagram,bloglovin,flickr,rss,email,custom1,custom2,custom3,custom4,custom5″]

Best, Katie

Merry Christmas From The Sullivans!

This post may contain affiliate links, please read my disclosure policy.

Merry Christmas! We hope that you are enjoying your holiday with those dearest to your heart.

We spend a lot of time sharing pictures of our home, with some stories about us and E sprinkled here and there. We thought today, which we believe should be a day all about family and Christ, we’d share a little bit more of ourselves, via a recent photo shoot with the talented Elisabeth Eden.

Right before the snow came to the midwest, we gathered at Elisabeth’s parents quaint family farm and simply enjoyed some time together as a family, with Elisabeth behind the lens, away from the hustle and bustle of our daily life.

In a short amount of time, she was able to capture a bit of our personalities and the overwhelming love we have for our little girl.

The past twelve months have been a little hard, we have been challenged, but the passing months have also been rewarding. We’ve had amazing opportunities, and most importantly we’ve had the chance to watch our daughter grow, thrive and learn. I can’t think of a better day to celebrate that then Christmas.

We hope you enjoy the photos above and below. Elisabeth is so talented that it was incredibly hard to narrow it down to just the photos in this post.

We hope you enjoy these photos as much as we enjoyed taking them.

One last time… Merry Christmas from the Sullivans!

We wish you a day full of love, laughter and miracles! Thank you for your support as we have shared our home and life with you.

God bless,
Katie, Daren and E.

*Elisabeth Eden retains all copyright to the photos in this post.


E’s outfit: Dress – Gap Kids | Tights – Gap Kids | Shoes – MICHAEL Michael Kors at Nordstrom | Bow – Gymboree

Katie’s outfit: Sweater – Loft | Jeans – AG at Nordstrom | Shoes – Toms | Scarf – Francesca’s

Daren’s outfit: Button Down Shirt – Club Monaco (similar) | Undershirt – Gap (similar) | Jeans – Levi’s 

Entertaining

How to Set A Very Merry Holiday Table

This post may contain affiliate links, please read my disclosure policy.

*This post contains affiliate links and gifted product from Grain Designs. As always, the opinions and design are my own.

Welcome to how to set a table – Christmas edition! To keep the cost down, we reused many of the items from our Thanksgiving table. See that post here.

However, a few small changes had a major impact on the appearance of our table and created a completely different vibe! We’re outlining what we did below.

Step 1: Arrange your centerpiece. For Thanksgiving, we did this later in the process. This time, we set up our centerpiece first because the arrangement, sans place settings, has had a place at our table all season long.

However, we followed the same basic formula as we did in November. The biggest difference is that we added a runner from Eco Chic Boutique.

We started, like last time, by setting out two wood chargers in the center to ground the display. Then we added our largest pieces, the black lantern and a potted fern we display in the house year round. We added a mixture of festive holiday items to the lantern, like fake snowacorns and ornaments. The fern replaced the pumpkins we used in the fall.

Next we added birch candles from Grain Designs, which we spread out across the length of the table. Just like last time, we finished the arrangement off by strategically weaving greenery through the open spaces, this time adding in a garland of red berries too.

Keep in mind that you may have to adjust some of the greenery as you add items to the table.

Step 2: Set the placemats at each seat. Ours are from Eco Chic Boutique, but if you are not local you can purchase similar cloth placemats at Target. We skipped the tablecloth for Christmas, since we wanted to keep it more casual. 

Step 3: Add a charger. We got our shiny red chargers from Michael’s for a steal! You can find very similar chargers from Target here.

Step 4: Stack your china on the chargers. You can purchase our Lenox china set here. For Christmas, we added small dessert plates from Target. Ours are not listed online, but these are similar.

Picking simple and classic china, makes it easy to mix-and-match fancy place settings with cost effective dishes. This allows you to create unique and different looks throughout the year for a reasonable price.

Step 5: Place a little token for your guests on the place settings. We chose a few small ornaments. You can find the snowflakes here and the bells here. Similar gold acorns can be found here.

Step 6: Add the water and wine glasses. You can find similar tumblers here and our wine glasses here.

Step 7: Fold your cloth napkins and place the forks. We used white cotton napkins. Real Simple has a great video on how to fold a napkin to hold silverware and you can see our photo tutorial here.

Step 8. Place the remaining silverware. The forks go on the left, and the knife and spoons on the right. This time we went with gold flatware. You can purchase our set here.

Step 9: Enjoy your beautiful table and have a happy holiday!

Wishing you a very, merry Christmas from our family to yours!

If you are hosting, share any tips you have for setting a holiday table below!

Lifestyle

Our Holiday Cards with Minted

This post may contain affiliate links, please read my disclosure policy.

As a traditionalist, I love holiday cards. There is something so nostalgic about mailing a greeting card. Smiling faces and holiday cheer have been flooding my mailbox for a few weeks now, and true to form I was a little behind schedule on ordering our holiday greeting card. Minted to the rescue!

Our christmas cards were rush delivered to us today, just in time to give me a few days to snail mail them before we go on vacation for the holiday. We couldn’t be happier with them.

As, a graphic designer, I’m pretty picky about invites and cards. This is actually the first year I haven’t taken on designing and printing them myself. Needless to say, my controlling self was a little bit nervous about giving up complete creative control, but after our experience with Minted, I may end up ordering with them every year.

It was so easy, plus I was able to give a bit of creative input. They have 100’s of designs to choose from. I knew I wanted to a card with a foil pressed detail, so a quick filter helped me narrow down the options. I tend to like minimalist designs, so I quickly browsed and found several great options, finally settling on the Be Joyful Christmas Photo Card.

I played around with Minted’s template, using photos from our recent photoshoot with the incredibly talented Elisabeth Eden, before choosing the two snaps below. 

E’s outfit: Dress – Gap Kids | Tights – Gap Kids | Shoes – MICHAEL Michael Kors at Nordstrom | Bow – Gymboree || Katie’s outfit: Sweater – Loft | Jeans – AG at Nordstrom | Shoes – Toms | Scarf – Francesca’s || Daren’s outfit: Button Down Shirt – Club Monaco (similar) | Undershirt – Gap (similar) | Jeans – Levi’s

I was able to zoom in and crop my photos on the website. Plus, they have a send special request button, where you can request a designer to make tweaks to the design. I wanted a large photo on the back, and Daren wanted the words “Merry Christmas,” so I sent the request via the system and had a proof in my inbox within an hour! Easy!

The icing on the cake, Minted offers FREE address printing. You upload an Excel document and they address them in stationary that matches your card! Game changer! Last year I literally spent hours hand writing each address on our envelopes, too many more years of that and I’d have definitely developed carpel tunnel.

I also have to note Minted’s customer service is awesome. My order was delayed by one day, so they completely refunded my shipping fee + gave me 15% off my entire order, effectively earning my future business.

Still needs to order your holiday cards?  Get cards by Wednesday, 12/21 with FREE rush shipping. Order tomorrow by 6:30 p.m. with Express Service. Code: SHIPNOW

Not in a hurry? Enjoy 15% off holiday cards. Code: WINTER16, Exp 12/19!

*Elisabeth Eden retains all copyright to the professional photos in this post.

Design

How To DIY A High End Mantel For Under $200

This post may contain affiliate links, please read my disclosure policy.

Custom fireplace mantels don’t come cheap, and DIYing a modern, but grand surround even intimidated us. Lucky for you, we love a challenge, so we did all the dirty work for you. Here’s how you can create a custom and modern mantel for a fraction of the price in your own home.

First off, when we were deciding how we wanted our fireplace to look, I did what any good home blogger would do, and I hit Pinterest for inspiration. I particularly liked this pin. We are going for an art deco lounge meets family play area look in this room, so we wanted something that looked super glam, but was also cost effective. After scrolling through our inspiration pictures, we realized we could easily create a similar look by layering molding from our local hardware store, rather than pay big bucks for a fully custom mantel. That is exactly what we did.

Here is what the fireplace looked like prior to our DIY project:

Here it is after (but still not fully completed):

Before we committed to doing the project ourselves, we hit Lowe’s to buy a few pieces of trim to test out different designs. We ended up settling on the mock up below. We then worked with Clearwater Custom Cabinets, who built and installed our bookcases and cabinetry, to create a panel around the fireplace for us to adhere our molding too. They used the dimensions from our mock up as a guide.

To fill the space between the molding and fireplace, we asked Northern Stone to use remnant pieces from our bar counter top, rather than traditional tile or stone. This fireplace surround created an interesting challenge. When we designed our mock up, we didn’t consider that our remnant stone was much thicker than tile. While we wanted molding around the fireplace to make it pop, we did not want the mantel to be thick enough to form a shelf. For this reason, the wood surround created by Clearwater was very thin. 

When it came time to install the stone, we realized that the stone protruded about a quarter of an inch past the paneling. While we could have stuck with our original plan, that simply had a trim piece butting up to the quartz, the stone would have stuck out ever so slightly from the molding and, being a wee-bit type A, we couldn’t have that.

It took some trial and error, head scratching, and an additional trip to Lowe’s to solve the problem, but we managed. After we had a game plan, we sent E to the grandparents and we began.

Step 1:

While we had decided against a thick mantel with a traditional shelf ledge, we didn’t want the mantel to come across as flat. To create depth, we decided the molding should get gradually thicker as it inched toward the edge, so Daren ripped some 2 X 4 boards we had left over from another project into 1/4″ strips using a table saw.


Step 2:

This is where we got a little crafty to hide the edge of our quartz surround. We used heavy duty construction adhesive to glue this corner guard, typically used for the corners of walls or to finish off cabinets, onto the side of the stone. Lucky for us the trim piece fit perfectly around the edge of the stone.

Step 3:

After the glue had some time to set, Daren stacked 1″ picture frame molding up against the corner guard and nailed the trim into place using a nail gun and 1.5″ finishing nails.

Step 4:

Again, to make up for the quartz remnant and to prevent the mantel from falling flat, we added depth by placing oak plywood around the remainder of the surround. Daren 45’d the corners to tie-in with the other seams of the framed mantel. Although it is hard to tell in the pictures, the wood trim we cut and placed around the edge of the fireplace mantel is flush to the plywood board. The edge of the plywood can’t be finished and would have look messy and rough, so that’s why we made the frame around it out of solid wood (see step 1). This allowed us to blend the side of the mantel into the built-in.

Step 5:

Next we nailed a small chair rail to the outside wood trim. We used this 1.375″ chair rail from Lowe’s.

Once this part was complete, Daren used a hand plane to ensure the edge of the mantel was flush to the built-in cabinet. He was pretty pumped to use the old school hand tool. 


Step 6:

After the chair rail was installed around the mantel, it was time for the big guns. We picked this dramatic 4.25″ crown molding to take center stage. We butted the edge of crown into the small chair rail, which partially covered the rail and hid the visible slant of the crown.

Step 7:

While the top of the crown fit perfectly into the edge of our design, we were left with an awkward and visible angled edge on the inside of the trim, as shown above and below.

To finish off the mantel, we filled the noticeable edge with a small 0.69″ cove. The hardest part of our mantel project was complete!

After we took a few minutes to admire our work. My “must complete project without eating, sleeping or stopping until it’s completely done” drive kicked in and we got to work on spackling, caulking and sanding the trim pieces until the mantel looked like one solid piece of wood.


Then, since we had already hired painters to paint the rest of the room, we let the mantel sit idle for a few weeks, while it waited for it’s final makeover.

Today it looks like this:

While it still needs a few coats of paint before it can be called complete, we are thrilled with the results.

This project cost us a grand total of $167.47, although we did have some of the supplies lying around.

It’s safe to say, in a weekend, you could complete this project for about $200, excluding the cost of tools. This is a fraction of the cost of a custom mantel, which will usually set you back 4-figures.

Things are a changing in our basement! If you follow me on Instagram, a couple of weekends ago, you probably saw my stories that gave real time peaks into our basement DIY projects. Now that the grunt work is more-or-less done, I have the time to finally share the tutorials on the blog. If you enjoyed this one, keep an eye out for tutorials on how to shiplap a ceiling and on how to wainscot an accent wall. Coming soon!

To make sure you don’t miss any of our musings, subscribe to get our posts directly to your email here or follow us on Bloglovin’ here.

Want to create this exact mantel? This is exactly what you need:

Supplies:

Tools:

Design

Our Holiday Home Tour – Main Living

This post may contain affiliate links, please read my disclosure policy.

fsmily-room-during-the-holidays

Welcome back for round two of our holiday home tour! If you missed round one, which featured our entry, office and mudroom click here.

The area you are about to see, is where we do most of our living. If you are a regular follower, you’ve seen lots and lots of shots featuring this area. Most of our photos on social media, that actually feature members of our family (okay, mostly photos of E) and are not just pretty room shots are taken right in this space. While this area of our home is a work in progress, I do love it in it’s natural form, but I tend to get bored when things stay the same for too long. To keep things interesting, this Christmas, we kept the base the same, but changed up almost all of the accessories.

Come see the transformation for yourself!

blue-accent
Tree – Target last year (similar) | Cotton & Greenery – Eco Chic Boutique

To keep things from getting too busy, I used a color scheme. Since we have inherited a lot of traditional holiday decor, we went with a relatively classic holiday color scheme — red, white, and a touch of blue and gold. Then we pulled in green, with lots of greenery. I also used a lot of raw materials, like wood throughout the space. I would call the look classic rustic.

I added the blue touches, like the vase you see above, to help tie in the holiday decor to our architectural details (i.e the bookcase backings and our kitchen backsplash).

While we used quite a few colors in our design, if you find that intimidating, I recommend picking two colors that either match or tie in nicely with your existing decor.

You can find loads of holiday decor in any color. Then use a variety of shades and textures within those two colors. Doing so will create depth within your room. The room will seem effortlessly festive, instead of matchy-matchy.

christmas-mantel-decorating-ideas
Sled – Vintage (similar) | Stockings (here & here)
stocking-close-up
Stockings (here & here)

These stockings from Pottery Barn Kids are my absolute favorite holiday item. Get them here.

I used somewhat non-traditional faux greenery from Hobby Lobby on the mantel to help blend my year-round plants into my Christmas decor. If I used only traditional garland, like evergreens, my more tropical plants would probably look a little odd. Given that my plants like sun, it is not an option to move them into the closets like the rest of our non-coordinating decor.

Side note: I find that if you have real plants, people don’t really notice when you throw in fake greenery. They assume it is all alive. This especially works well with succulents, and it applies all year long.

shelf-decor-for-the-holidays
Snow Globe | Lantern – Eco Chic Boutique
shelf-details-during-christmas
Frame | Tree

I replaced about 95% of our regular bookcase items with Christmas trinkets, both old a new. This was doable since the shelves are on the smaller side. I did not attempt this with my wall-to-wall bookcase in the office.

hanging-in-the-family-room-at-christmas

E loves all the trinkets spread out throughout the open concept living area. I keep everything within reach kid friendly or hard to break. She is able to play with much of the decor, with the exception of the items on the ottoman. For some unknown reason, she has never been interested in what I place there. I, in return, I do not draw her attention to the items. So far this is working for me, but it might not for you.

eco-chic-sign-for-the-holidays
Sign – Eco Chic Boutique

decoratin-shelves-for-christmas

little-village-on-christmas
Houses – Hallmark & Costco | Trees – Various

Villages remind both Daren and I of our childhood Christmases, so for sentimental reasons we like to show off our collection. We inherited some of the houses and supplemented with a very affordable set from Costco. Lots of trees add interest, and are surprisingly easy to find throughout town. I added a few small trees to our collection, this year, from Target’s dollar section. The more elaborate trees can be found at Hallmark.

To fill out the empty space on our ICSS Supply Co. floating shelves, I added a meaningful sign from Eco Chic Boutique. It helps remind me what this holiday season truly is about.

small-merry-christmas-sign
Sign – Eco Chic Boutique
Greenery, Runner & Lantern – Eco Chic Boutique | Birch Candles – Grain Designs
deer-head-for-christmas-decor
Deer Head | Fur Pillow | Striped Pillow – The Vintage Rug Shop

We tried to add simple and festive details throughout the whole space. We wanted to feel a little bit of the Christmas spirit everywhere we looked. The majority of the decor is in the family room, but we added touches throughout the kitchen and dining area too.

The deer head was gifted to me by sister-in-law from Nordstrom and is a favorite of mine. The exact product is no longer available on their site, but you can find it in white here.

The Land of Nod, design for kids and people that used to be kids
 

christmas-decoratinmg-for-open-floorplan

You may have noticed I am a big fan of wreaths.

Wreaths are not just for the outdoors. Add them anywhere – windows, mirrors, with garland on the stairwell, your dining table to anchor a centerpiece, or even on your range hoods.

I highly recommend picking up some small boxwood wreaths, like this. I use them with candles and to dress up the dinner plates in my china cabinet.

christmas-tree-with-family-ornaments

Our tree is very much a family tree. While it is not the tree of Mommy’s dream, it is pretty magical.  I would really like the Pottery Barn look – Flocked, big matching ornaments, white lights. You know the look. However, seeing the joy my daughter has when playing with and rearranging the overwhelming plastic and sentimental ornaments is worth sacrificing that picture perfect tree over and over. This year we are all about Frozen ornaments.

family-room-at-christmas

pillows-for-the-holidays

Last holiday decor tip of the day – Pick a style or item, like gold glitter, fur, sticks, etc. (anything really) and place it in different ways throughout your room.

I used red berries and cotton throughout our space, including in our christmas tree. This is especially handy when decorating an open concept floorpan because it keeps the eye moving and ties all the spaces together.

Hope you enjoyed the tour! Happy Holidays!

Shop the Look:

*This post contains affiliate links.

Design

Our Holiday Home Tour – Entry, Office and Mudroom

This post may contain affiliate links, please read my disclosure policy.

This week I have a huge dose of Christmas cheer for you! Call me Santa Clause, because I’m bringing joy to our household one garland at a time. Presents coming later.

Decorating for Christmas has been a process, but I am happy to report I have successfully completed one floor! While our upstairs bedrooms and bathrooms, may be business as usual for now, we really got in the spirit on the main floor. In fact, E and my child-at-heart-husband inspired me to go a bit overboard and a lot outside my comfort zone,

I’ll be sharing our holiday home in a series of posts, starting today with our entry, office and mudroom.

Entry

Entry Decorated for Christmas
Wreath (similar here and here) | Faux Fur | Custom Bench – Grain Designs | Pillows – Old from Target (similar here and here) |Mirror (similar) | Norfolk Island Pine Tree  | Rug – The Vintage Rug Shop

Last year the majority of our home was still a complete mess, so we decorated with almost 100% family-hand-me-downs in the main living area and called it a day. It, ahem, looked very eclectic. However, right before the holidays last year, we purchased this beautiful gold, round mirror from McNeal & Friends. It was begging for a festive wreath. (Sometimes my decor speaks to me. It’s totally normal). I had no choice but to purchase the one above from Eco Chic Boutique.

While I completely changed how we decorated our home this Christmas, this wreath found itself right back in the same place.

Funny story. After completely slacking and not ordering greenery for the outdoors, I came across some decently priced holiday tree’s during one of our routine trips to Lowe’s. I thanked my lucky, starry-night stars, and purchased a few for the porch. Well, turns out they are Norfolk Island Pines and they don’t do well with temperatures below 35° F! I still live in the frozen north, so this cute, indoor tree will be living in my entry. Look for the others when you tour the upstairs, and please don’t ask about my porch decor!

entry-for-christmas
Wreath (similar here and here) | Mirror (similar) | Bench – Grain Designs | Planter | Rug – The Vintage Rug Shop | Art

Speaking of warm weather trees, I felt our fiddle leaf fig should get in on the holiday action, so I wrapped it in these twinkle lights from Target. You’ll notice during our holiday tours, that our lights are colored. I’d much prefer white lights, but it is two-against-one, and because I have a generous, holiday spirit I have decided not to use my veto power.

In all seriousness, I decorate for my daughter above personal aesthetics. If left to my own devices, our decor would be minimal and be mostly greenery. In other words, completely different than what you’ll see on these tours. Christmas decor should bring cheer above all things. In my household, cheer happens to mean colored lights.


Office

gold-deer-in-office
Bookcase – Ikea hack from Billy Bookcases | Gold Trees (Medium and Small) | Deer Candles – Hobby Lobby (Similar) | Tealights

The one room, however, that is all mine is my office. You’ll notice the decor is deliberate and minimal. While this is an aesthetic preference, it is also because the thought of taking apart and putting back together my bookcases gives me a migraine. Decorating for Christmas should be fun, not daunting.

simple-christmas-decor
Bookcase – Ikea hack with Billy Bookcases | “hello” | Gold Trees (Medium and Small) | Desk Calendar (2017 Edition) | Flowers – Home Goods (similar) | White Frame | Art – Paintings by Evan
cait-courneya-christmas-decor
Desk cancer (2017 Edition) | Gold Trees (Medium and Small)

I enjoy decorating, but even I can only commit to going all out in one area of the house. However, subtle touches do make a difference, You really don’t need to go all out to have a festive home. If you have a busy schedule, don’t enjoy decorating, or just prefer minimalism, I recommend picking up two to three holiday items that coordinate with your room or house’s existing color scheme.

Mudroom

hand-lettered-christmas-chalk-board
Daily System | White Houses – Target In-Store (similar online here) | Garland (similar)
Daily System | Pillows – old (similar here and here)

It is very important that our mudroom remains functional, so we kept the decor light in here too. While I didn’t want the decor to interfere with our everyday activity, I also didn’t want the room to be overlooked entirely. This is where we enter our home, and I wanted the first impression to be warm, festive and cozy.

It didn’t take much to make an impact. I picked up the ceramic houses from Target’s dollar section, added a red pillow to the bench and used washable chalk marker’s from Michaels to amp up the chalk board. Then, I finished it off with garland.

Hope you enjoyed today’s tour! We’d love to see pictures of your homes too! Tag us on social media @prettydomesticated.

Next, we will show off our main living room’s holiday decor. I’m also working on a series of posts about our basement.

To get realtime updates, follow us on Instagram!

*This post contains affiliate links.

Entertaining

How to Set a Rustic and Glam Thanksgiving Table

This post may contain affiliate links, please read my disclosure policy.

how-to-set-a-thanksgiving-table

*This post contains affiliate links and gifted product from Grain Designs. As always, the opinions and design are my own.

Cooking a turkey is a lot of work, so who wants to be stressed about trying to create the perfect table too. To help our readers out, we did the leg work for you. We looked to nature to create a festive, fall tablescape this Thanksgiving. It doesn’t take long to set up, but still looks as fancy as your home cooked meal.

Our table is pulled together, but not over the top. While I love a formal table, we are going for a more laid-back, glam look this holiday. Read below for a tutorial on how to recreate our simple and rustic table.

placesetting-steps-1-and-2

Step 1: Place the tablecloth on the table. You can purchase a similar tablecloth here.

Step 2: Set the placemats at each seat. Ours are from Eco Chic Boutique, but if you are not local you can purchase similar cloth placemats at Target.

placesetting-steps-3

Step 3: Add a charger. We chose a round gold Cynthia Rowley charger with subtle etched leaves. You can purchase the same chargers here. If you have Amazon Prime they should be delivered in time for the turkey!

*I start with the placemats and the chargers because it gives me a good idea of how much room I have for the centerpiece. 

centerpiece-step-4

Step 4: It’s time for the fun part — the centerpiece. We kept it earthy and festive with apples, wood, white pumpkins and greenery.

We purchase the pumpkins and apples from our local grocery store and the greenery from Eco Chic Boutique. If you are lucky, you may be able to find similar greens in your back yard.  Otherwise, you can pick up your supplies on Amazon. Pick up the cotton here, wheat bundles here, and similar faux branches here.

The black lantern is also from Eco Chic. You can purchase a similar lantern online here.

The wood candles (c/o) are from Grain Designs. We recommend picking them up at their holiday pop up shop. For non local shoppers, similar candles are available here.

stages-of-creating-the-thanksgiving-centerpiece

We started the centerpiece by setting out two wood chargers in the center to ground the display. Then we added our largest piece, the black lantern full of red apples and sticks, followed by the birch candles. We spread out the candles across the length of the table and then used the pumpkins to fill in the gaps.

creating-centerpiece

Finally, we strategically placed the greenery to fill the remainder of the open space. Keep in mind that you may have to adjust some of the greenery as you add items to the table.

centerpiece-top-view

Tiny Prints - Thanksgiving Sale

apples-in-centerpiece

Since we have an open floor plan and our dining table is located within the same space as our kitchen, we are able to go all out with the centerpiece. We can serve the food straight from our kitchen, instead of at the table. If you need to leave room for dishes, we recommend sticking with candles at varying heights, like these. It looks elegant and dramatic, but takes up minimal space.

placesetting-steps-5-and-6

Step 5: Stack your china on the chargers. You can purchase our Lenox set here.

setting-the-table

Step 6: Add the water and wine glasses (or in our case champagne glasses). You can find similar tumblers here and the champagne glasses here.

how-to-fold-a-cloth-napkinStep 7: Fold your cloth napkins and place the forks. We used white cotton napkins. Real Simple has a great video on how to fold a napkin to hold silverware.

step-8-completed-place-setting

Step 8. Place the remaining silverware. The forks go on the left, and the knife and spoons on the right. You can purchase our flatware here.

ste-9-youre-ready-to-serve

Step 9: Enjoy your beautiful table! It’s time to take a seat and eat your perfectly cooked turkey! You’re going to have to find someone else for a tutorial on that one!

center-piece-view

thanksgiving-table

e-sitting-at-table

pillows

far-away-view-of-thanksgiving-table

Thanksgiving is one of my favorite holidays because we have a chance to connect with our extended family. A big meal and a full belly has a strange way of bringing families together and I love every bit of it, no matter how hectic it gets.

We hope you gobble ’till you wobble this weekend and give thanks for all your blessings!

Tell us your Thanksgiving plans below!

Know someone who would love this table setup? Share our post using the buttons below!

[wc_share_buttons]

Design

The 5 Best Christmas Pins

This post may contain affiliate links, please read my disclosure policy.

Welcome to Freestyle Friday – Christmas Edition! This trend is likely to continue until Santa Claus makes his way through our fireplace… err… or our front door, since all of our fireplaces are gas. How exactly does that work?

It may be disrespectful to Thanksgiving, but I can’t help but get in the Christmas spirit with all the holiday decor gracing the stores. During my weekly Target run, I picked up a gingerbread house kit, gingerbread cookies mix, cookie cutters, a few Santa Claus books, Elf on the Shelf and a snow globe. I may be just a tiny bit excited. With E being 2 years old it is the first year she can somewhat comprehend the concept of Christmas and Santa. I have always loved Christmas, but seeing her get so excited over little things like a snow globe truly makes this the best time of the year.

We don’t decorate until after Thanksgiving, but I know many people are decking the halls this weekend. Today’s post is all about inspiration, so without further ado here are my 5 favorite pins from the week featuring Christmas decor!

Click on each picture for the source of the original pin.

christmashousetour2015craftberrybush-42

This is the tree by Craftberry Bush is the tree of my dreams, but I am a sentimental at heart so our own tree is full of mismatched ornaments every year. It’s definitely on the more eclectic side, but I’ll never give it up. Next year, I’m hoping for a family tree full of mismatched ornaments and popcorn string in the basement, with a perfectly coordinated tree on the main floor, which would be the best of both worlds. I’ll be keeping this pin in mind when the time comes.

white-christmas

Tiny Prints - Birth Announcements and More
 

Sometimes simple is best. I love how perfectly restrained this space from Dreamy Whites. As much I wish we were minimalist, we are not. If you are, I highly recommend this homey, yet elegant look.

550021c7d42ad-hanging-candy-canes-1210-s3

I may actually attempt this look from Good Housekeeping in my home. That is, if E is still short enough to not be able to reach the candy canes. I’m afraid this decor won’t last long, because girlfriend’s got a major sweet tooth. #gotitfromhermama

cute-christmas-house

This house spotted by Studio McGee is beyond cute, so that definitely helps make their traditional Christmas decor shine. I’m a bit of a traditionalist and this house reminds me of how we decorated my childhood house, so it gives me all the feels.

christmashousetour2015craftberrybush-10

For the last holiday inspiration picture, I picked another shot from Craftberry Bush. As of today, they are now my number one source for Christmas decor ideas. I like that this is festive, cozy and relatively kid friendly. That’s a wining combination in my book.

Like what you see above? Don’t forget to follow us on Pinterest for inspiration from our own house and around the web.

Happy decorating!

share your moments
#prettydomesticated
follow along
@prettydomesticated